Yoga is the best way to lose weight; however, it is a time-consuming process that requires innovation, practice, and development. The figure is shown sitting in a yoga school in rishikesh traditional cross-legged yoga pose, with its hands resting on its knees. The figure was named Shiva Pashupati by archaeologist Sir John Marshall, who discovered the seal. According to Indian mythology, Lord Adi Nath, another name for Lord Shiva, is the creator of yoga, and Parvati, his divine consort, is his first disciple. Indus Valley Civilization seal depicting a figure in meditation posture, possibly Pashupati. The yoga was later refined by the rishis, who documented it as asanas in the Upanishads. We have now practised these asanas in the form of yoga poses.
The five basic rules of yoga
for beginners and all are as follows:
- Exercise
- Diet
- Breathing
- Relaxation
- Meditation
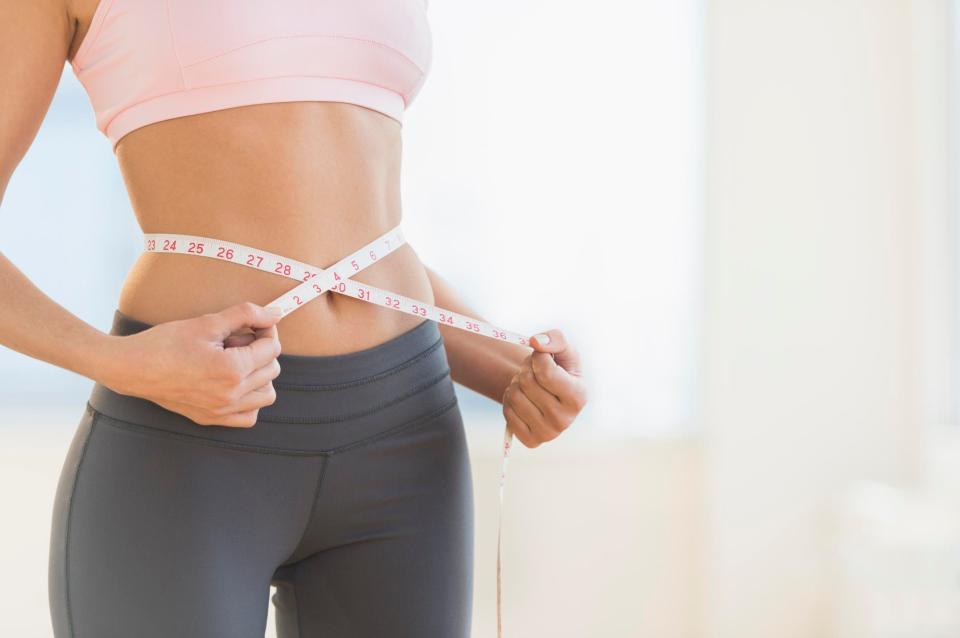
Yoga for beginners weight loss and flexibility
One of the most important aspects of yoga teacher training in rishikesh good physical health is flexibility. However, your body may lose flexibility over time due to ageing, sedentary lifestyle, stress, or poor posture & movement habits. Regular home practise of yoga can also help to increase your flexibility.
Yoga for beginners’ weight loss is more than just a few strengthening poses. It has additional advantages such as increased flexibility, improved respiration, increased energy & vitality, balanced metabolism, improved athletic health, increased muscle tone, improved cardio health, weight loss, and stress management.
Yoga poses performed at home can also aid in weight loss & the maintenance of good physical & mental health.
Yoga Asanas for Weight Loss for Beginner
Yoga for beginners at home did not 200 hour yoga teacher training in rishikesh produce immediate results because the yoga poses are simple enough that anyone can do it at home. These Yoga poses primarily focus on increasing body flexibility, improving concentration, & increasing muscle tone, while also working on weight loss when combined with a proper diet.
Some of Yoga Asanas for Weight Loss for Beginners are :
- Chaturanga Dandasana – Plank Pose
- Virabhadrasana – Warrior Pose
- Trikonasana – Triangle pose
- Adho Mukha Svanasana – Downward Dog pose
- Sarvangasana – Shoulder Stand Pose
- Sethu Bandha Sarvangasana – Bridge pose
- Parivrtta Utkatasana – Twisted Chair pose
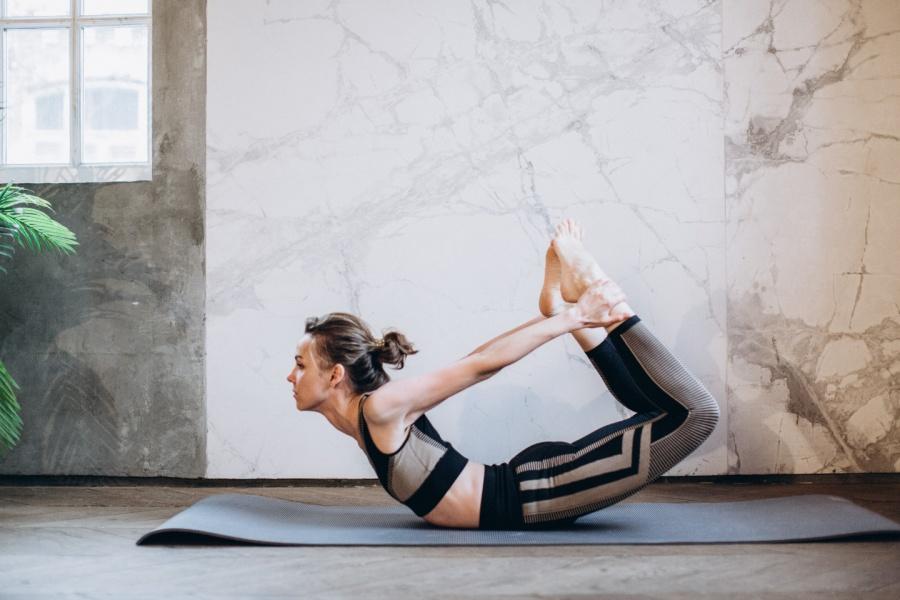
- Dhanurasana – Bow Pose
- Surya Namaskara – Sun Salutation Pose
- Chaturanga Dandasana – Plank Pose

The Plank Pose, known as Chaturanga 200 hour yoga teacher training in india Dandasana, is the most effective way to strengthen the core. As simple as it appears, the benefits are enormous.
Benefits of the Chaturanga Dandasana (Plank Pose)
- Strengthens and tones the entire body.
- It aids in the attainment of a flat stomach.
- Strengthens and stabilises the core.
- This arm balance prepares the body for other arm balances.
Are you ready to do?
steps are as follows:
1: Place your face down on the mat.
2: Start with to a plank position, with your elbows directly under your shoulders and your forearms facing forward.
3: You should be looking at the floor with your head relaxed.
4: Feel the vigour in your abdominal muscles. Maintain a straight and rigid torso (धड़) and a straight line from your ears to your toes with no sagging or bending.
Step 5: Hold this position for 20 seconds. Release to the floor.
2. Virabhadrasana – Warrior Pose
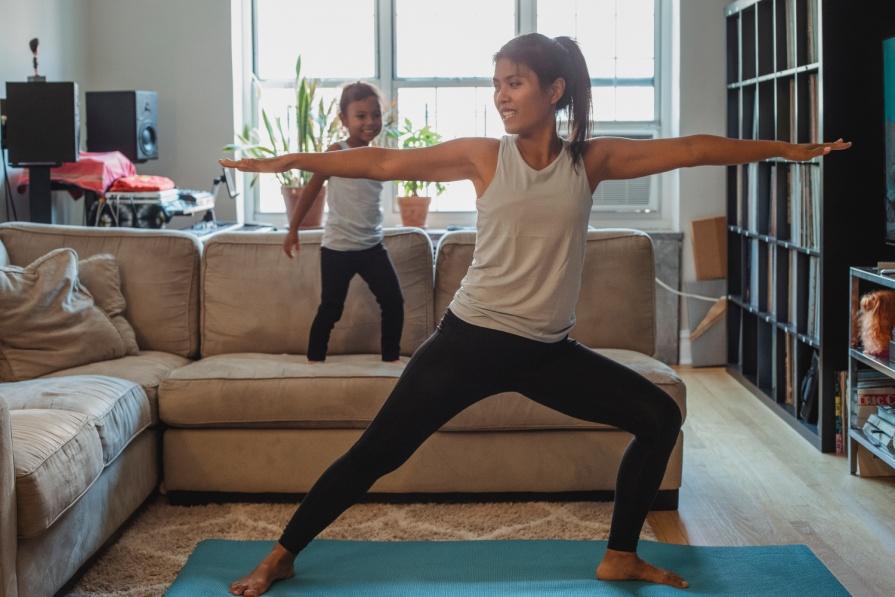
This pose/asana is pronounced Vee- Ra- Bha- Dra-aasana.
Virabhadrasana is derived from three Sanskrit words:
- Veera – warrior;
- Bhadra – bright;
- Asana – Posture.
Benefits of the Warrior Pose (Virabhadrasana)
- Arms, legs, & lower back are strengthened and toned.
- Improves overall body balance.
- It aids in the development of stamina.
- Extremely useful in the case frozen shoulders.
- Brings luck, courage, grace, & peace.
Are you ready to do?
steps are as follows:
1 : Stand up straight and spread your legs at least 3-4 feet apart.
2: Raise both arms sideways to shoulder height, palms facing up.
3:Bend your right knee and turn your head to the right. The right foot should be 90 degrees out and the left foot should be about 15 degrees in.
4 : Stretch your arms for 10 seconds as you settle into the yoga posture.
5 : Return to step 1 and repeat steps 2, 3, and 4 for the left knee (turn your left foot out by 90 degrees and your right foot in by about 15 degrees).
6: Rep these steps 2–3 times on each side. Overtime can be used up to 5, 10, or 15 times.
3.Trikonasana – Triangle pose

Although Trikonasana has many health benefits, it should be avoided if you have a migraine, diarrhoea, low or high blood pressure, or neck and back injuries.
Benefits of Triangle pose (Trikonasana)
- Reduce Back ache
- Enhances digestion.
- Balance and concentration are improved.
- Assist in achieving a flat stomach.
- Work on your adaptability.
Are you ready to do? steps are as follows:
Step 1: Stand up straight and spread your legs at least 3-4 feet apart.
Step 2: Bend your body to the right side and down from the hips, bringing your right hand down and your left hand up. The right foot should be 90 degrees out and the left foot should be about 15 degrees in.
3: Maintain a straight waist and keep your eyes open.
4: Return to step 1 and repeat steps 2, 3, and 4 for the left side.
5: Repeat these steps on both sides 2 to 3 times. Work your way up to 5, 10, or 15 repetitions.
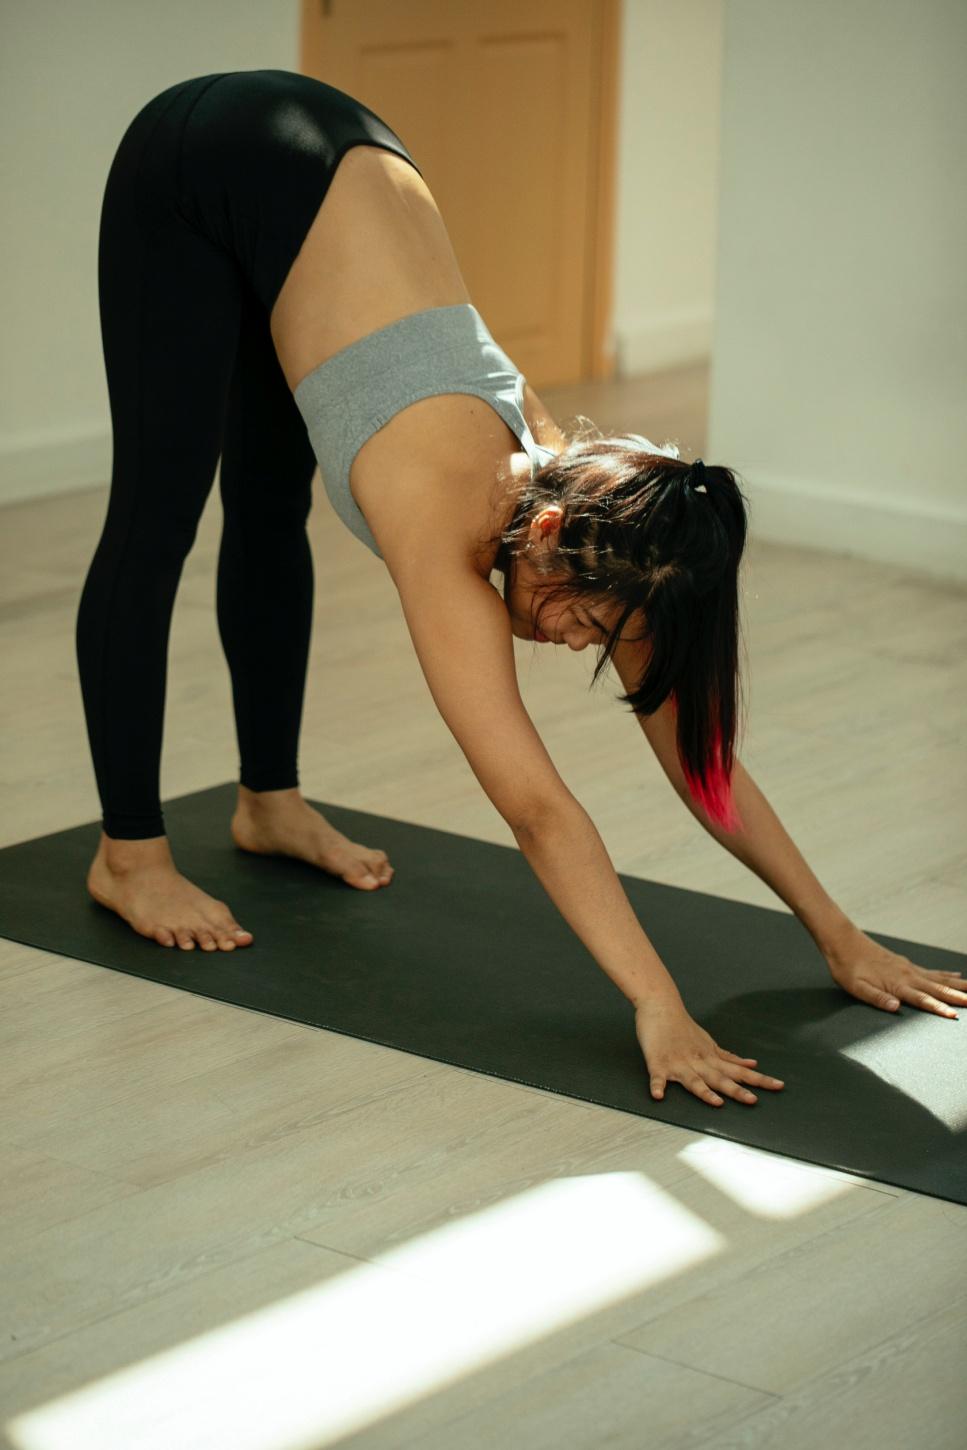
4. Adho Mukha Svanasana – Downward Dog pose
Downward-Facing Canine This pose strengthens and tones the arms & legs, opens and strengthens the shoulders in flexion, lengthens the hamstrings, stretches the calves & prepares the body for heating.
Advantages of Adho Mukha Svanasana (Downward Dog Pose)
- The entire body is fortified.
- The back of the body is stretched, including the ankles, calves, hamstrings, and spine.
- It calms the mind.
- It improves blood circulation.
Are you ready to do? steps are as follows:
1: Take the child pose.
2: Raise your knees off the ashtanga yoga teacher training in rishikesh floor keeping your knees slightly bent and your heels lifted off the floor at first. Raise the shoulder on the palms and keep the arms straight.
3: Raise your hips into a V-shape.
4: Maintain this posture for 10 seconds.
5: Return to step 1 & repeat 5 times more.
6: Lower yourself to the ground. Overtime can be set to 15 20, or 30 seconds.
- Sarvangasana – Shoulder Stand Pose
Sarvangasana, also known as the shoulder stand strengthens the upper body abdominal muscles and legs as well as the respiratory system and sleep.
Benefits of the Sarvangasana (Shoulder Stand Pose)
- Nerves are calmed.
- It alleviates anxiety, insomnia, and irritability.
- Aids digestion and hair problems.
- get a flat stomach improve flexibility

Are you ready to do?
steps are as follows:
1 : Lean forward when seated.
2: To raise your feet toward the sky, bend your knees slightly and press your arms into the ground.
3: Step your feet backwards until your neck feels comfortable.
4: Take the plow stance by lowering your feet to the ground. Hold hands together on the ground and jiggle each shoulder individually.
Step 5: Support your lower back with your hands while attempting to maintain an elbow distance of around shoulder width. Knees can rest in an egg-shape on the forehead if legs are relaxed.
Step 6: When you feel steady lift each foot toward the ceiling while stretching your legs as needed.
Step 7: descend, soften your knees softly toward your forehead, return to the plow, and then slowly lower your back to the mat.
8. Increase the amount of overtime to 15 or 20 seconds.
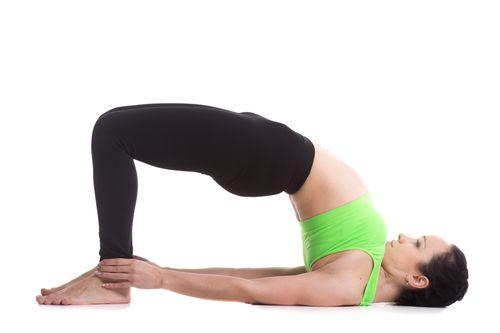
- Sethu Bandha Sarvangasana – Bridge pose
The correct way to say Sethu Bandha Sarvangasana is SET-UU BAHN-DAH SAR-VAHN-GAHS-ANNA. Setu is the Sanskrit word for “bridge,” sarva is “all,” and anga is “limb.” As a result, when performing Setu Bandha Sarvangasana, your body forms a bridge using all of your limbs. As you inhale deeply and gather your strength to ascend into this pose, see a bridge across placid water.
Benefits of the Sethu Bandha Sarvangasana ( Bridge pose)
- Working on the abdomen while strengthening your lower body and core will help you achieve a flat stomach.
- The spine can be strengthened to aid with low back discomfort.
- practice being flexible.
Are you ready to do?
steps are as follows:
1: Lie on your back with your knees bent, your legs parallel, and your feet hip-distance apart in the center of the mat.
2: Plant your feet firmly on the ground and inhale as you lift your hips and twist your spine off the ground.
3: Slid the arms with the palms down next to the torso. The heels should be lightly touched with the fingertips.
Hold the position for 10 to 15 seconds in step four.
Step 5: Gently lower the spine to the ground.
6. Increase the amount of overtime to 20 or 30 seconds.
7.Parivrtta Utkatasana – Twisted Chair pose
The pronunciation of Parivrtta Utkatasana is PAHR-ee-VREE-tah OOT-kuh-TAHS-uh-nuh. Parivrtta Utkatasana is its three-word Sanskrit name.
- The word “Parivrtta” means “revolved”
- The word “Utkata” means “powerful” or “fierce”
- The word “asana” means “pose”
Benefits of the Parivrtta Utkatasana (Twisted Chair pose)
- It is an effective strategy to shed pounds.
- bolsters the hips and legs
- extends the chest and shoulders

Are you ready to do?
steps are as follows:
1 : Place their feet hip-distance apart as the first step.
2: Breathe in and raise your arms so they are perpendicular to the floor above your head.
3: Bring your thighs as close to the floor as possible by bending your knees. Your body will roughly create a right angle over your thighs and your knees will protrude out slightly over your feet.
4: Bend your arms and place your hands together at your chest in the position of a prayer.
5: Maintain this stance for ten seconds.
6: Return to step 1 and repeat to the opposite side.
8.Dhanurasana – Bow Pose
Are you trying to figure out how to get rid of that abdominal fat?
The ideal posture to reduce belly fat in a shorter amount of time is bow stance. “Asana” refers to a stance or pose, while “dhanu” denotes bow.
Benefits of the Dhanurasana –(Bow Pose)
- Strengthen your back and improve your flexibility
- gain a flat stomach
- aids in the treatment of menstrual problems.
Are you ready to do?
steps are as follows:
1: Lay on your stomach with your 200 hour ashtanga yoga teacher training in rishikesh arms by your sides and your feet apart, parallel to your hips.
2: Bend your knees, reach back with your hands and grasp your ankles
3: Draw your knees up & toward your back while raising your chest off the floor.
4: Smiling while gazing directly ahead
5: Hold this posture and the inhaled air for ten seconds.
6: Let go of the ankles relax and exhale.
9.Surya Namaskara – Sun Salutation Pose
Surya Namaskar is the ideal method for weight loss and a complete package of health benefits.It trims the waist tones the arms, stimulates the digestive system, balances the metabolism, and stretches and tones most of the major muscles.
Benefits of the Surya Namaskara (Sun Salutation Pose)
- increasing the body’s flexibility
- help shed weight
- improve concentration
- increase body stamina
- makes you more focus
- help in weight loss

The 12 steps of surya namaskar
- Step 1: Pranaam Asana: Begin by standing straight with your heels slightly apart and your toes touching. Your weight is equally distributed over both feet in this stance. Incorporate your hands into the Anjali mudra and inhale deeply and gradually.
- Step 2: Inhale and extend your arms over your head, keeping them straight, while you perform the hastha uttanasana. In order to absorb energy from the sun, this salutation is made to it. Take a slight arching position with your back.
- Step 3: Bend forward from your hips toward the Earth and touch it with your fingertips to perform Paad Hastha Asana. Even your entire palm can be used. While doing this, avoid bending your legs.
- Step 4: Sanchalan Ashwa Asana: raise your head while bringing your right leg back and planting your palms. As in the last asana, make sure your left foot is bent and in front of you.
- Step 5: Parvatasana: Assume a slow plank posture. Pay attention to how you are aligned here. Maintain a straight, synced tailbone, shoulders, and hands.
- Step 6: Ashtanga Namaskar: Lower your knees gradually to the floor, tuck your elbows in, and lower your chin and chest so that your hands, knees, and chin are the only portions of your body that contact the ground. gaze ahead.
- Step 7: Perform Bhujangasana, which involves lowering your whole body to the floor while simultaneously raising your chest and straightening your hands. Your legs and feet are pressed into the mat while you bend backwards lifting your head chest and abdomen.
- Step 8: Parvatasanaa: raise your hips 100 hour ashtanga yoga teacher training in rishikesh and tuck your palms and toes into the earth. This is the stance when your thighs and core are used. You accomplish this by bringing your chest up against your thighs.
- Step 9: Ashwa Sanchalan Asanaa: At this point, you are going back to where you were.As you bring your left foot back, your right foot should be bent and grounded at the front. Raise your rear leg while keeping your toes tucked into the mat.
- Step 10: Stand up straight and bend forward to perform Paad Hastha Asana. As you bend from the hip joints, both your left and right legs should be in the same straight position. Keep your fingers in contact with the ground.
- Step 11: Align your palms in a salute towards the sun while extending your hands over your head to do the upward salute position, or Hastha Uttanasana. Bend backward just a little bit.
- Step 12: Return to the starting position by doing Pranam Asana. Maintain a straight posture and bring your hands together while bringing them close to your chest.